Friday, 4 May 2012
Wednesday, 25 April 2012
Stop Motion Assessment
What I will consider for my next project is the quality of the pictures. On this one, at the end the photos look kind of blurry. Yet on the camera I didn't see that. Hope the quality will be better for the big project. The rest is pretty straightforward to me as I already followed a video course back in secondary and I'm pretty satisfied with my production. I think, however, that I will put much more effort in the editing part for the big project so it's even better.
Wednesday, 18 April 2012

Wednesday, 11 April 2012
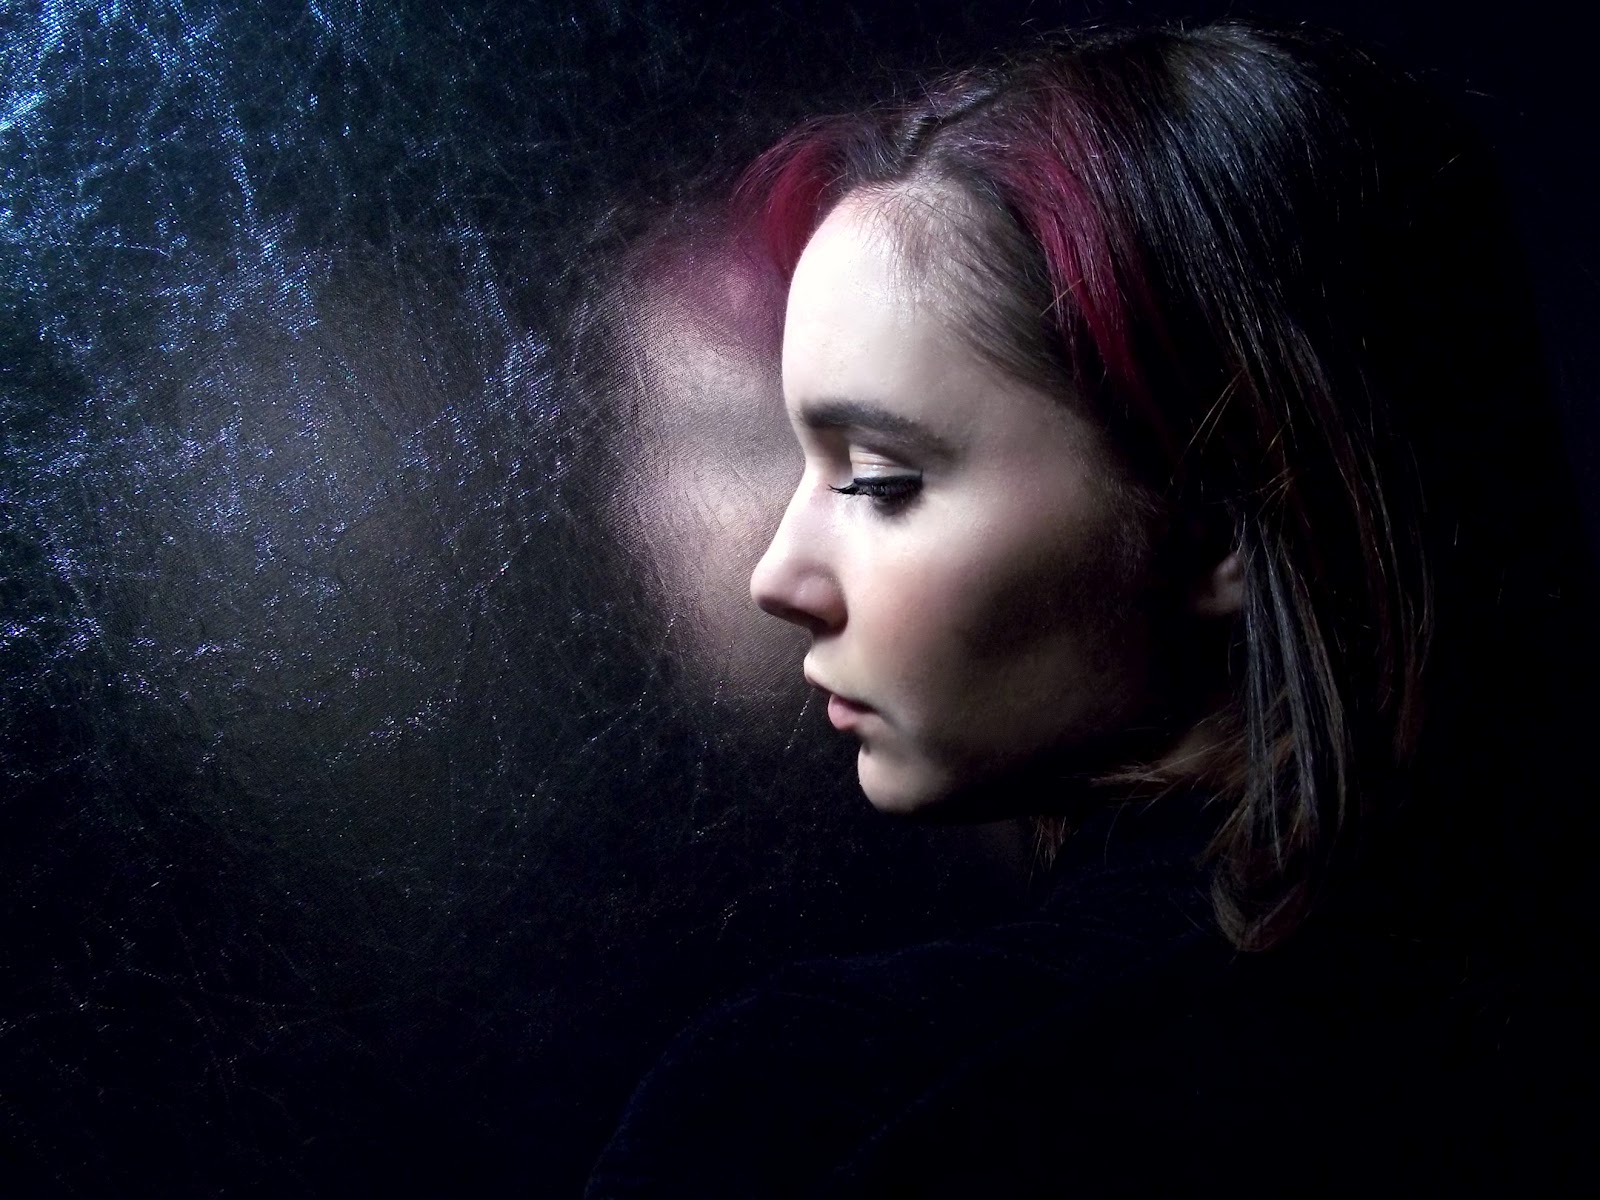
Creative and Environmental Portraits
Creative Portrait:
Alone with her Reflection
Environmental Portrait:
Nothing Better than a 60s War Movie with my tail-wagger @ 2am

Wednesday, 4 April 2012


Wednesday, 28 March 2012
Editing in
Photoshop Elements
Re-touched:

No Effects used, only tools.
Makeover #1:

Effects used: Find Edges
Makeover #2:

Effects used: Quadrant Colors, Lizard Skin
Makeover #3:

Effects used: Old Photo
Makeover #4:

Effects used: Patch Work
Makeover #5:

Effects used: Add Noise, Color Halftone,
Mosaic, Tint Green, Facet,
Wednesday, 21 March 2012
How the Camera Sees (In class assessment)
Part 1: Focal Lenght
Shortest (Wide angle)

Longest (Telephoto):

Observations: The model looks wider when shot with the longest
focal length. I suppose that’s because with the wide angle, we have more depth
of field so objects are compressed and look smaller.
Part 2: White Balance
Tungsten:

Shade:

Observations: Tungsten is kind of bluish and Shade is kind of
yellowy but I find that it looks nice. This is probably because when we say to
the camera that there will be shade (therefore no light) she automatically
prepares so maybe the ISO goes higher or the lens becomes bigger in order to
let more light in. I suppose for the bluish photo it is the opposite; less
light gets in the lens because it converged.
Part 3: Camera’s Light Meter
Far from window:

Close-up:

Observation: On the close-up we see more details of the face and
on the other photo we don’t see the face. This is because, I think, that if one
is closer to the object exposure is higher so the picture is lighter and we see
more.
Subscribe to:
Comments (Atom)